
Created Wednesday 16 October 2019
Wize stands for Will's Improved Zim Exports, it is composed of five html exports templates :
- Wize
- Wize_with_index
- Wize_with_index_sod
- Wize_Print
- Wize_S5
Installation
First close zim, then checkout the git repository and move it to $HOME/.local/share/zim :
rm -rf $HOME/.local/share/zim
mv wize $HOME/.local/share/zim
After that, link the wize.rb program present in the wize directory to a place in your PATH, for example $HOME/bin
cd $HOME/bin
ln -s $HOME/.local/share/zim/wize.rb
Then run the wize.rb program with the -i flag :
wize.rb -i
You can now restart zim.
Features
Wize is a customizable export template for zim, it also modify the style.conf file in $HOME/.config/zim/ to have corresponding colors between zim and the export. This modification is made based on the file style-template.conf located in $HOME/.local/share/zim. So if there's something you don't like or want to add, you may modify this one. The style.conf file will be generated every time you applied a theme. Also the Wize_Print export will be used when using "Print to browser".
On the following is a list of the features, mentionning where it is applied, that can be :
- zim : applied in zim itself
- html : applied in the main html exports :Wize, Wize_with_index, Wize_with_index_sod
- print : applied in the special Wize_Print html export
- S5 : applied in the special Wize_S5 html export
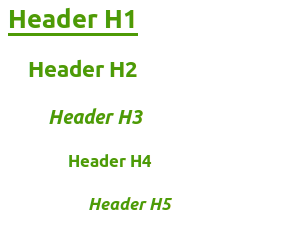
Headers
Applied in : zim, html, print, S5
To have a better visibility on which kind of section the reader is, All headers are indented
Underlined text
Applied in : zim, html, print, S5
As a matter of personal taste, I do not like the highlighted behavior of the underline marking. Thus underlined text is underlined. This original behavior can be easyly restored as we will see later in the customization part.
Verbatim
Applied in : zim, html, print, S5
To emphasized it, inline verbatim is colored in (customizable) darkmagenta.
as well as
block verbatim
Note that block verbatim is indented. Zim make the difference between inline and block when there's at least two lines selected when applying the style by pressing <Ctrl>T.
Tables
Applied in : html, print, S5
Tables in zim using the table plugin are not very practical, but with the adequate styling it can be nice on exports.
| First Name | Name | Fav. Color | |
|---|---|---|---|
| Nathalie | Charpentier | nathalie.charpentier@lasbas.com | Green |
| Electra | Cigales | electra.cigales@nowhere.com | Red |
| Marcel | Dupont | marcel.dupont@nothere.com | Blue |
| Joe | Smith | joe.smith@here.com | Orange |
One interesting thing to know in that in zim source (which you can view using the entry in the Tools menu), tables are in "MarkDown" syntax. The table above is represented by the following text.
| First Name | Name        | email                           | Fav. Color |
|:-----------|:------------|:--------------------------------|:-----------|
| Nathalie   | Charpentier | nathalie.charpentier@lasbas.com | Green      |
| Electra    | Cigales     | electra.cigales@nowhere.com     | Red        |
| Marcel     | Dupont      | marcel.dupont@nothere.com       | Blue       |
| Joe        | Smith       | joe.smith@here.com              | Orange     |
It is possible to paste a text like that (without verbatim of course) and then press <Ctrl>R, zim will recognize it and display the table using the plugin. This can be really usefull if you use a table generator such as the excellent https://www.tablesgenerator.com/ which can export in MarkDown format.
Pictures
Applied in : html, S5

In the exports, pictures will appeared centered. It is not applied within the print export because as a side effect, pictures can be cutted during print.
Syntax Highlighting
Applied in : html, print, S5
Code blocks inserted with the source view plugin will be syntax highlighted in the exports.
#include <iostream>

int main(int argc, char *argv[]) {
  /* An annoying "Hello World" example */
  for (auto i = 0; i < 0xFFFF; i++)
    cout << "Hello, World!" << endl;
  char c = '\n';
  unordered_map <string, vector<string> > m;
  m["key"] = "\\\\"; // this is an error

  return -2e3 + 12l;
}
This is achieved by integrating https://highlightjs.org/ . There are a number of possible themes. These are not really customisable but they can be modified inside the main templates.
By default a light theme is used for the print export, and a dark one for the others.
Font
Applied in : html, print, S5
The font for the print export is "serif" and "sans serif" for the others.
Navigation
Applied in : html, print, S5
The navigation menu and icons are depending depends on the actual export.
Wize_Print
No navigation added.
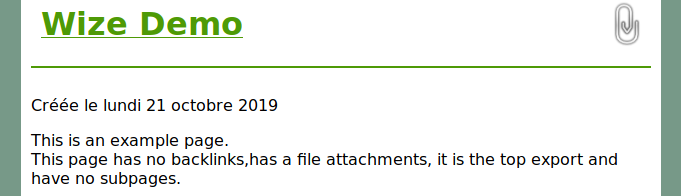
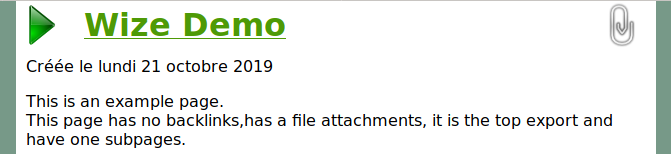
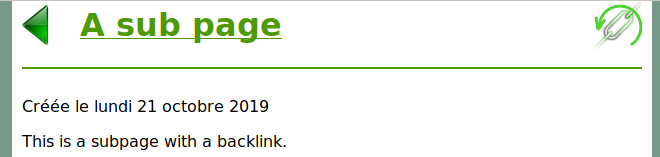
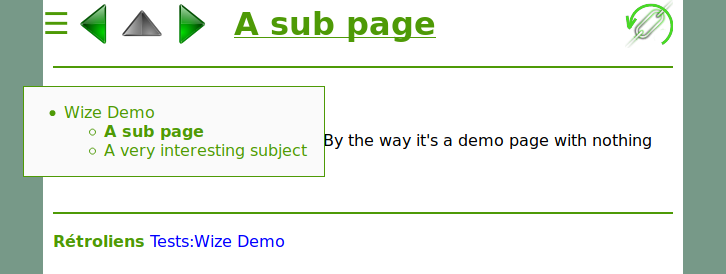
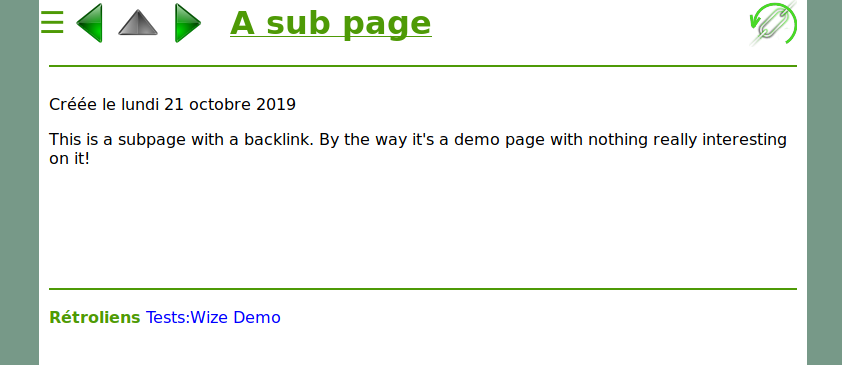
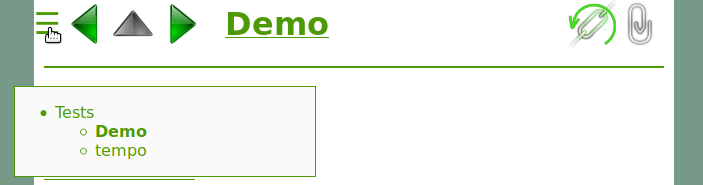
Wize
Minimalistic navigation :
There's a permanent header in which the page title is reported, as well as navigation arrows, backlinks and attachments icons but only displayed if needed. For single page export this might be the best one.
The following pictures shows different situtations (actual width has been shrinked to take screenshot)

Wize_with_index
There's a permanent header in which the page title is reported, as well as navigation arows and a menu button that will open/close the index menu. Backlinks and attachments icons are only displayed if needed.

Wize_with_index_sod
A variation of the previous one. The difference is that the side menu is opened by default and can be closed to increased the reading width.

Wize_S5
This is a special export to make slide-show presentation, it is based on the provided SlideShow_(S5) export adapted to wize.
Please look at the page describing it : Wize Presentation
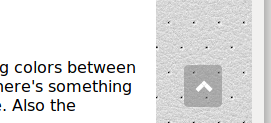
Go to top Button
As soon as you scroll, a "Go to top" button will appear on the bottom right :
Theme switching
The script wize.rb is used to managed the differents themes :
Display available themes :
$ wize.rb -l
blue
wize
Show current theme :
$ wize.rb -p
wize
Apply an other theme :
$ wize.rb -a blue
All done!
The modifications to the exports are immediately available however for the new colors to be applied in zim itself, you must restart it.
Customization
Each theme is defined by the directory common-theme located in $HOME/.local/share/zim/templates/html. To create a new theme based on the wize theme, copy the directory :
cp -r common-wize common-mytheme
Let's have a look at its content now :
$ ls common-mytheme
arrow-left-inact.png   arrow-up.png      zim-pres-override.css
arrow-left.png         attachment.png    zim-pres-variables.css
arrow-right-inact.png  backlink.png      zim-print-override.css
arrow-right.png        notice.js         zim-variables.css
arrow-up-inact.png     zim-override.css
Pictures
The names of the different pictures are self explanatory, replace them with the ones you wish, however every picture must be present in the directory even if it's not modified and their size is better be 48 pixels.
Optional pictures
There are five optional pictures that will be used if they are present :
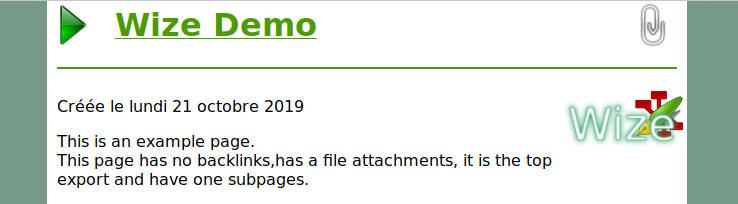
- logo.png : this logo will be placed on the top right of each page
- logo-pres.png : this logo will be placed on the top right of each slide with Wize_S5
- fond.jpg : this picture will be used as background image instead of the background color
- fond-pres.jpg : this picture will be used as background on each slide with Wize_S5
- favicon.ico : this will be used as the favourite icon in the browser
Example use of logo.png :
![]()
Example use of fond.jpg

CSSs
There are 5 CSSs files in the directory :
- zim-variables.css is used to defined variables for most of the theme
- zim-pres-variables.css contains variables specific to Wize_S5
- zim-override.css is used to override some behaviors
- zim-pres-override.css has the same purpose but for Wize_S5
- zim-print-override.css same purpose also but for Wize_Print
zim-variables.css
All variables have comments and have generally self explanatory names, for example :
--main-header-color: #4e9a06; /* Headers color */
You may look at some sites like the excellent w3schools.com to know more about css colors and css in general.
As an example you may replace :
--main-u-decoration: underline;
--main-u-background-color: white;
by
--main-u-decoration: none;
--main-u-background-color: yellow;
to restore the original zim behavior of underlined text.
zim-override.css
This file can contain anything you want to change from standard behavior. As it will be read in last position, it will have precedence. There's two examples by default in it :
The "normal" definition for verbatim blocks is :
        pre        { color: var(--main-pre-color);
                     margin-left: 20px;
                     margin-right: 5px;
                     margin-bottom: 5px;
                     margin-top: 5px;
                     font-family: monospace;
                     font-size: large }
that will ended with a result quite similar to what you see in zim :

Now we have this in zim-override.css
    pre {
        background-color: #EFEFEF;
        padding: 5px;
        border: solid #aaa 1px;
        border-radius: 4px;
    }
and we have the following result :

JS file notice.js
This file is a small piece of javascript code used to write a short notice at the end of the pages. By default it writes an empty string.
For example let's write this :
printNotice = function() {
    /* You may put into variable notice a short text that will
     * appears at the end of the page, that can be for example
     * a confidentiality warning or anything
     */
    var notice =
    "This document is a wize export of a <a href='https://zim-wiki.org/'>zim</a> notebook!";
    /*"";*/
    document.getElementById('foot-notice').innerHTML = notice;
}
And we will have at the end of each page :

Complement : in doc configuration
Some "in document" configurations using special H5 headers have been introduced for the Wize_S5 template, but these are available for all. Look at Wize Presentation for their descriptions.
Applying the new theme
To apply your custom theme, you just have to enter :
$ wize.rb -a mytheme